
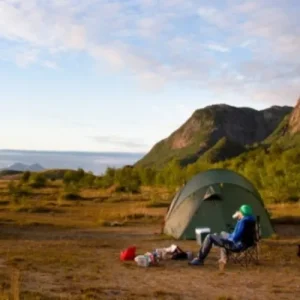
Half of summer camping is a battle for shade. And among the options, the hexa tarp (hexagonal tarp) is the most popular sun shelter in midsummer because it is open on all sides for good airflow. Yet even the same tarp can vary greatly in coolness and stability depending on where, in which direction, and in what order you pitch it. This article is organized so you can follow along exactly in the order you actually set it up, together with illustrated diagrams drawn like patent drawings.

- Choose the spot and orientation — ridge parallel to the wind, the sun-facing side low
- Spread the tarp and mark the peg positions (footprint) — guyline at 45° (d≈H), temporarily fix 2 corners
- Raise the 2 main poles to lift the ridge (2 people recommended)
- Tension the guylines in an X, starting from the diagonals
- Drive the pegs in firmly at 45–60° against the pull
- Summer setup — open the sides, shade the low side, make a drainage channel
1. Check Your Gear
| Item | Quantity (standard) | Notes |
|---|---|---|
| Hexa tarp body | 1 | UV-blocking; water resistance of 1,500mm or higher recommended |
| Main poles (220–250cm) | 2 | The thicker (28–32mm), the more stable in strong wind |
| Auxiliary sub-poles (180–200cm) | 0–4 | Lift the side corners to secure space and airflow (optional) |
| Guylines (pull cords) | 6–10 | Cords with reflective thread recommended (nighttime safety) |
| Pegs / stakes | 8–14 | Soil: forged pegs · Sand: long pegs/sand pegs |
| Line tensioners | 6–10 | Fine-tune the tension |
| Rubber mallet · gloves · spare cord | 1 set | Driving pegs · emergency repair |
2. Choosing the Spot and Orientation (Half of Summer)
Before pitching a tarp, the step of deciding the spot and orientation is the most important. In summer especially, you need to consider both the wind path and the shade.
- Ground — A flat, well-draining spot. Avoid waterways, low-lying ground, and dry creek beds (risk of flooding in a downpour).
- Overhead — Check for dead branches (deadfall), power lines, and beehives. Safety comes first.
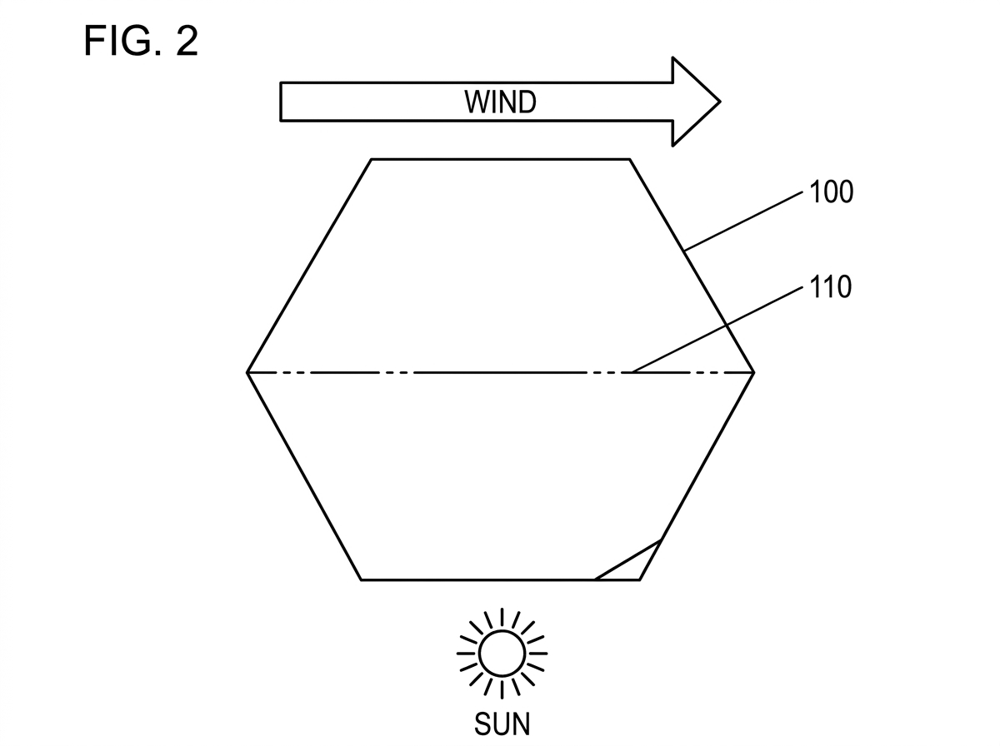
- Wind — Place the ridge (the line connecting the main poles) parallel to the prevailing wind so the wind flows along the side. If it hits head-on, the tarp flaps and gets ripped out.
- Sun — Lower the tarp's low corner toward the side where the midday-to-afternoon sun comes in (usually south to west) to cast a long stretch of shade.
3. Marking the Peg Positions — The Top View and the 45° Principle
Once you've decided the orientation, before raising the poles, first mark where you'll drive the pegs (the ground footprint). Spread out the tarp and temporarily fix the corners at both ends, and the layout will fall into place. What determines the left-right position (distance) of the pegs here is precisely the angle the guyline makes with the ground.
Looking down from above, the guyline at each corner extends outward, and the pegs form a hexagon one ring larger than the tarp. The peg's horizontal distance (d) is proportional to the height of the point (H) where the cord is attached — the cords at the ridge ends (the tall main poles) place the pegs farther out, while the cords at the low side corners place the pegs closer in.

Why is 45° (when the horizontal distance equals the height, d ≈ H) the benchmark? The answer comes from splitting the guyline's tension into two parts. The cord's tension divides at the peg into a horizontal component (the force holding the pole from toppling) and a vertical component (the force pressing the tarp down to anchor it), and at 45° these two become equal, giving the best balance.
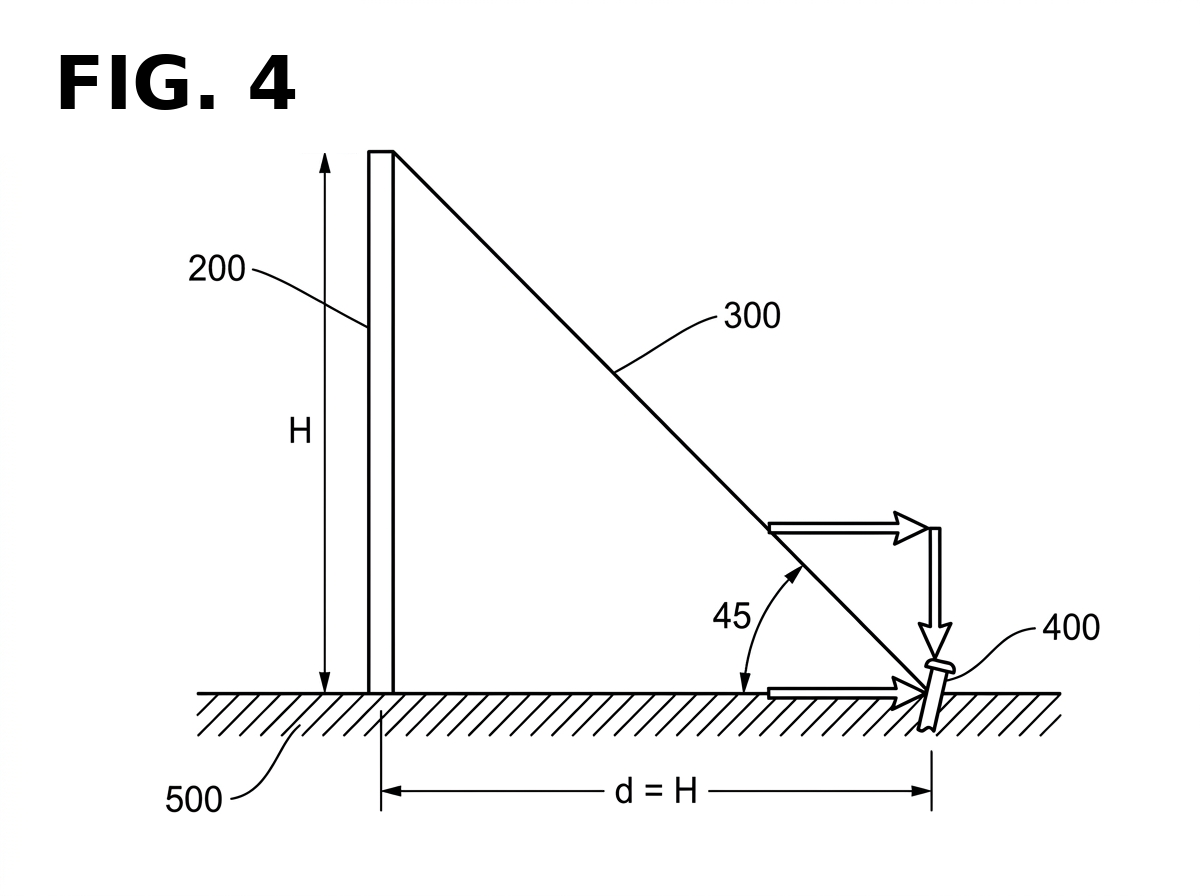
- 45° (d ≈ H) — recommended. The horizontal and vertical forces are equal, the most balanced state.
- If the peg is too far and the cord is too flat (angle ↓): the pressing force decreases and the cord actually lifts the tarp, while the cord tension rises and the peg pulls out more easily.
- If the peg is too close and the cord is too steep (angle ↑): the holding force decreases, and the pole topples inward or fails to withstand the wind.
Practical guideline: Aim for the guyline to be at about 45° to the ground, and drive the peg outward by the height at which the cord is attached (d ≈ H). If space is tight, 30–45° (d = H to 1.7H) is fine, but if the cord is nearly horizontal (under 20°) or nearly vertical (over 60°), it becomes unstable. ※ This "cord angle (45°)" and the "peg-driving angle (45–60°)" that comes later are different angles.
4. Raising the Main Poles & Tensioning the Guylines
Once you've marked the peg positions and temporarily fixed both ends, now raise the poles. The hexa tarp's stability comes from the pole angle and the guyline tension.
- Set the poles not vertical but tilted slightly outward (5–10°). This balances the force of the guyline pulling on the pole.
- Make the ridge guyline in a straight line with the extension of the pole tip — the force on the pole must transfer straight into the cord, or it will topple.
- The peg distance, as seen earlier, is 1 to 1.5 times the pole height (d≈H). Too close and the pole falls inward.
- Alternate tension between opposing cords — pulling only one side hard tilts the pole (X balance).

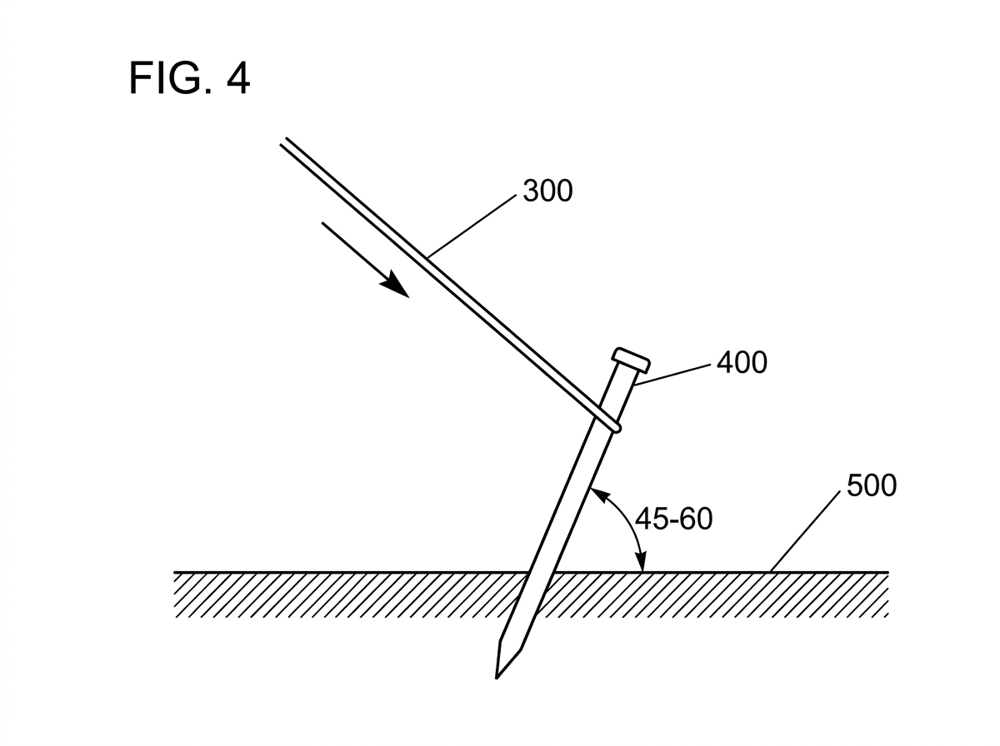
5. The Peg-Driving Angle — The Most Common Mistake
Key point: Lean the peg at an angle opposite to the direction of pull, driving it so the guyline catches the peg almost perpendicularly. The angle to the ground is 45–60°. If you lean the peg toward the pull side, it becomes the same axis as the cord and pulls straight out.
6. Summer Ventilation & Shade & Coping with Rain
A summer tarp has to capture coolness and rain readiness at the same time.
- Ventilation — Use sub-poles to lift the side corners (awning style) so the wind passes underneath. Blocking all sides traps the heat.
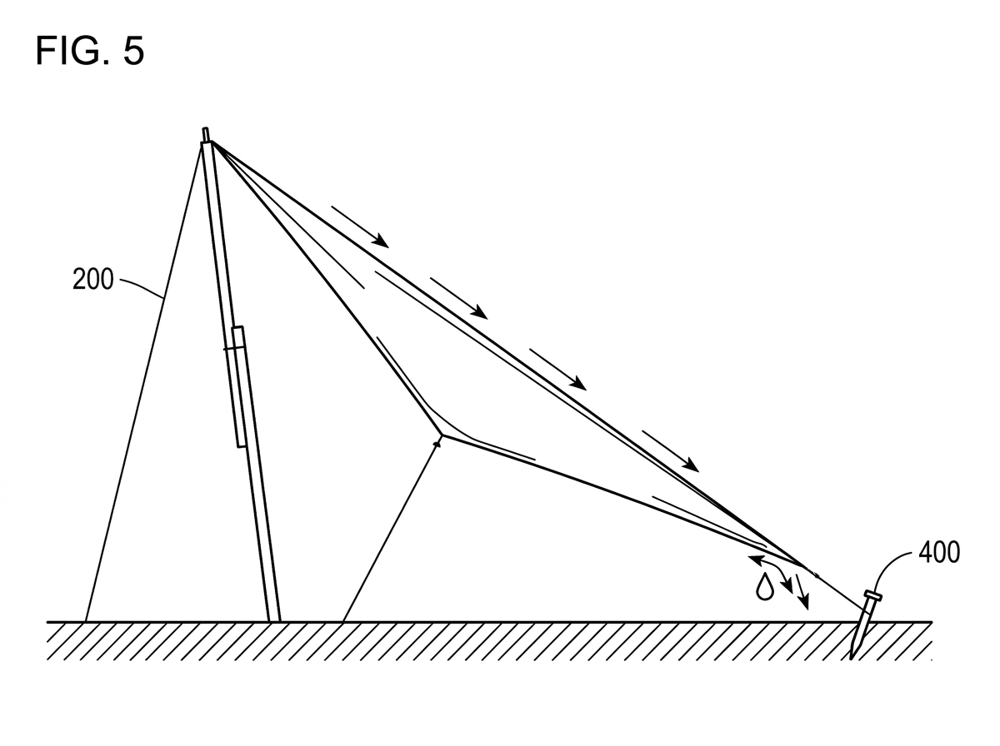
- Shade — In the afternoon when the sun comes in low, lower the west corner to stretch the shade out. If possible, pitching it overlapping with the shade of a large tree reduces fabric heating and is far cooler.
- Downpours — Clearly lower one corner to create a drainage vertex so rainwater flows to one place. If the center sags, water pools and it collapses.
- Gusts — If the forecast warns of strong winds or thunderstorms, reinforce the pegs and guylines, or if severe, strike camp in advance. A tarp catches the wind like a sail.
7. Safety Rules & Striking Camp
- Attach reflective stoppers to the guylines so you don't trip over them at night.
- No open flames (fire pits or burners) under the tarp — the fabric is flammable and melts in heat.
- When striking camp, pull pegs out vertically with the hammer hook, and store cords and pegs separately (to prevent loss).
- Fold the fabric only after it is completely dry. Storing it wet causes mold and damages the waterproof coating.
To sum up — parallel to the wind → start with the peg footprint (45°, d≈H) → raise the poles and tension → pegs at 45–60° against the pull → one side as a drainage channel. Follow it exactly in the order you actually pitch, and your summer tarp will be cool and sturdy.

댓글 0
첫 댓글을 남겨보세요.